One of the big reasons why WordPress is so successful is down to how easy it is to get a website set up and running. It can literally be minutes.
However, as your website grows, or you start to manage multiple WordPress-powered websites, you’ll soon find certain tasks within the WordPress admin area become tedious and time consuming.
Navigating between admin pages, waiting for pages to load, updating themes/plugins…it all builds up.
WordPress are aware of this and have provided a solution; step forward the WordPress Command Line Interface: WP-CLI.
In this article, I’ll cover how to install and configure WordPress, install themes, plugins and set up users using WP-CLI.
- What is WP-CLI
- Download WordPress with WP-CLI
- Install WordPress with WP-CLI
- Manage Themes and Plugins with the CLI
- Theme update commands in WordPress CLI
- WordPress CLI plugin commands
- Create users using the WordPress CLI
- Get experimenting with WP-CLI
What is WP-CLI?
WordPress CLI is the command line interface for WordPress.
This will allow you to manage certain aspects of your WordPress website without having to log in to the wp-admin area. You’ll be able to install and update plugins and themes, update WordPress core version and much more.
WP-CLI is readily available with your 20i hosting and can be accessed through SSH.
Essentially, whatever task you need to do in wp-admin, there is usually an equivalent with WP-CLI.
As you’ll be able to complete the task with much less navigation and not wait for a page in wp-admin to load, using WP-CLI for those tasks will be much quicker.
If you’re already familiar with SSH and the command line, WP-CLI won’t be daunting to use and will be a great addition to your developer tools.
If you’re a beginner or not familiar with command line, this article will be a good starting point for you.
Download WordPress with WP-CLI
Downloading WordPress using WP-CLI will mainly apply to your website if it is hosted on our Shared Linux Hosting platform. Websites hosted on our optimised WordPress hosting platform will already provision with WordPress files pre-installed.
If this is your first-time using command line and WP-CLI and you’re just looking to play around and experiment, I recommend to create a new non-live hosting package or a directory which will not affect your live website.
First, you will need to access your website via SSH. We have a support guide on how to connect your website using SSH.
If you’ve successfully configured SSH and connected to your website, you will be placed in the root of the website. You can check the current directory by running this:
pwdThis will output the path to your current directory in the following format:
/Path/to/your/current/directoryIf you want to create a directory to download WordPress in to, you can use the ‘mkdir’ command to create the directory. The following example will create ‘wordpress’ directory.
mkdir wordpressYou can then navigate to the directory using the ‘cd’ command. Here is an example:
cd wordpressYou can check the directory by running pwd as before this will output the path to the directory, i.e:
Path/to/directory/wordpressNow that you’re in the directory you want to install WordPress in to, you can now download WordPress using WP-CLI.
Every WP-CLI command will start with ‘wp’ and then a following command. The following command will download WordPress in your current directory:
wp core download
Install WordPress with WP-CLI
Once WordPress has downloaded, you’ll be able to continue with the installation process using WP-CLI.
Please note, if you haven’t created a database, you will need to do so. Then, you’ll need to create or update your wp-config.php file to connect to the database.
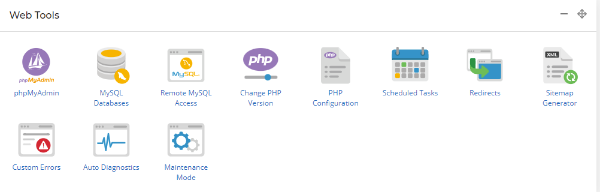
You can create a database via My20i hosting control panel > ‘MySQL Databases’. You can find detailed instructions here: Create a MySQL database.
Once you’ve created the database, you can create a wp-config.php file with your database credentials by using the following WP-CLI command:
wp config create --dbname='dbname-example' --dbuser='db-user-example' --dbhost='db-host.mysql.example' --dbpass='strongpassword'You will just need replace the data between the quote marks with your real database credentials. I’ve broken down what each part of the command is:
‘--dbname=’ This is where you’d input your database name
‘--dbuser=’ Where you’d input your database username
‘--dbhost=’ Your database hostname
‘--dbpass=’ Database password
Your WordPress installation will now be connected to the database you’ve created, and you can complete your WordPress install.
The following command will set the website URL, website title, create the admin user, password and email.
wp core install --url='yourdomain.com' --title='yourwebsitename' --admin_user='admin' --admin_password='strongpassword' --admin_email='user@example.com'As before, you’ll just need to replace the data between the quote marks with the real details.
Once that’s done, your WordPress website should be up and ready.

Manage Themes and Plugins with WP-CLI
Now your WordPress installation has completed, you can now start installing your plugins and themes. Here are some simple commands which should help you get started with plugin and theme management. We’ll start with theme related commands.
You’ll be able to install a theme directly from wordpress.org using WordPress CLI, which will be the latest version, or you can install from a local or remote zip file.
wp theme install <theme|zip|url>Here are some examples of each option:
This will install the latest version from wordpress.org and activate the theme:
wp theme install twentytwentytwo --activate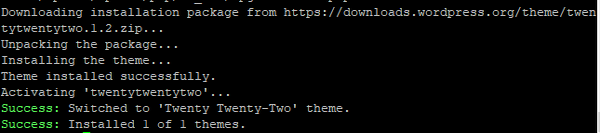
You can search for a theme that’s available within wordpress.org by using the following command in WP-CLI:
wp theme search <keyword>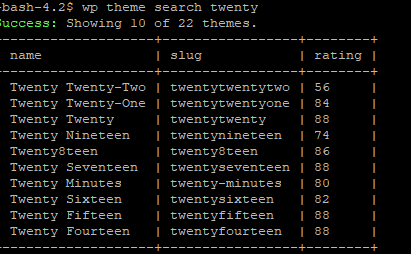
You can then install a theme by using the ‘slug’ name in your command
This will install from a local zip file.
wp theme install path/to/zip-file.zipThis will install from a zip file that is located remotely
wp theme install http://domain.com/wp-theme.zip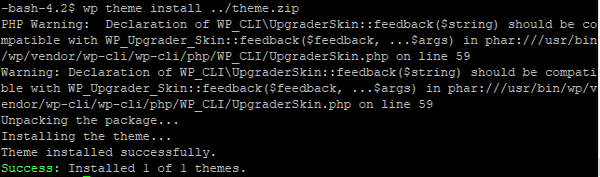
If this was successful, you’ll see the same ‘success’ message as above in the screenshot.
Theme update commands in WP-CLI
The following commands will update the themes that you’ve installed to your WordPress installation. The usual practice would be to do this in the wp-admin area but by using WP-CLI the process will be much quicker.
Update a theme:
wp theme update <theme name>Update multiple themes
wp theme update twentytwentytwo twentytwentyoneUpdate all themes
wp theme update --allExclude a theme when bulk updating themes:
wp theme update --all --exclude=twentytwentyoneActivate a theme:
wp theme activate <theme>Deactivate a theme:
wp theme deactivate <theme>Plugin commands
In the same way as above, you can install a plugin from wordpress.org, a local zip file or a remote zip file via a URL
Install the latest plugin from wordpress.org and activate:
wp plugin install <plugin name> --activateInstall from a local zip file:
wp plugin install path/to/plugin.zipTo install from a remote zip file via a URL:
wp plugin install https://domain.com/wp-plugin.zipUpdate a plugin or multiple plugins:
wp plugin update <plugin name>Activate plugin or multiple plugins:
wp plugin activate <plugin>Deactivate plugin or multiple plugins:
wp plugin deactivate <plugin>Now that you have your desired themes and plugins installed, you’ll be able to view a list of what you have installed, status, if an update is available and the version of plugin or theme:
wp theme listThis will display something like the following:
+—————–+———-+——–+———+
| name | status | update | version |
+—————–+———-+——–+———+
| phox-child | inactive | none | 1.0.0 |
| phox | active | none | 2.1.4 |
| twentytwenty | inactive | none | 1.9 |
| twentytwentyone | inactive | none | 1.5 |
| twentytwentytwo | inactive | none | 1.1 |
+—————–+———-+——–+———+
wp plugin list+———————–+———-+———–+———+
| name | status | update | version |
+———————–+———-+———–+———+
| akismet | active | available | 4.2.2 |
| contact-form-7 | active | available | 5.5.6 |
| elementor | active | none | 3.6.5 |
| envato-market | active | none | 2.0.7 |
| hello | active | none | 1.7.2 |
| one-click-demo-import | active | none | 3.1.1 |
| phox-host | active | none | 1.7.6 |
| really-simple-ssl | active | available | 5.3.1 |
| revslider | active | none | 6.5.19 |
| wp-stack-cache | must-use | none | |
+———————–+———-+———–+———+
Create WP Users using the WordPress CLI
So that’s your WordPress website mostly set up. If you want to add additional WordPress admin users to your website, you can do so using WP-CLI. Here’s an example:
wp user create ‘user’ ‘user@example.com’ --role=‘’You will just need to fill the data between the quote marks. For the role of the user, possible values are ‘administrator’, ‘editor’, ‘author’, ‘contributor’, ‘subscriber’.
There are additional options you can add to the above command, here are a few examples
--user_passThis will create the password for the user
--send-emailSends the user an email with their new account credentials
--porcelainThis will output just the user ID after running the command.
So, your command will look something like:
wp user create 'user' 'user@example.com' --role='administrator' --user_pass='superstrongpassword' --send-emailYou’ll just need to replace the data between the quote marks (‘’) with the real data. After the command is run, you’ll have successfully set up the user using WP-CLI.
Get experimenting with WP-CLI
Hopefully this guide has been helpful and given you a feel for WP-CLI and the benefits of speed and efficiency it offers.
You can create a WordPress install, install and manage themes and create users very quickly.
This guide is just a starting point and you can build on your knowledge by exploring the commands on the WordPress official website and having a play around with them in your 20i WordPress Hosting.
It’s a great way to impress clients with your ‘leet codr’ skills!
Are there WP-CLI commands you make of use regularly? Let us know below.