
The history of image compression and optimisation is as long as that of the internet itself. Since websites first came online, web designers have been seeking to compress their image files for better performance.
Today, however, the image optimisation landscape is complex. There are plenty of tools out there that you can use to resize images, either online or offline. We’ve built powerful image optimisation capability into our own Web Acceleration Suite, for example. But if you want to more about the many different ways that images are optimised, what tools are available, and how they actually do it, I’ve got you covered.
It’s a big subject, so here’s some shortcuts:
- Why image optimisation is important
- How to optimise images for the web: file size and image size
- Understanding image file size optimisation
- File types for image optimisation
- Image conversion and optimisation tools
Why image optimisation is important
User experience is a key battleground
As many as 38% of users say they will stop visiting a website if it has a “sloppy and unattractive” design. This shows how critical visual elements such as images are, as they can help you to achieve a visually striking, professional-looking website. However, this can’t come at the expense of other aspects of the user experience, such as page loading times.
Page loading times are a crucial consideration for all businesses operating online. Even a 100-millisecond delay in website load time can hurt conversion rates by 7 percent. Every second counts when it comes to page loading, which is why images need to be optimised to support swift display in the user’s browser.
Optimised images provide international scope
Internet connections are not universal – they vary dramatically in terms of speed and quality. As of April 2021, Singapore led the world in terms of fixed-line broadband download speeds, achieving 245.5 Mbps on average, just ahead of South Korea in second place.
By comparison, the United States lay in 11th place with 191.97 Mbps, while the United Kingdom was 47th, at 92.63 Mbps, below the global average of 102.12 Mbps. Cuba, Yemen, and Turkmenistan all achieved less than 6 Mbps.

The UAE led the way in terms of mobile internet, with a download speed of 190.87 Mbps on average, compared to a global average of 53.38 Mbps. While the UK comfortably exceeds this average, Ireland does not, achieving only 47.62 Mbps on average. Venezuela featured in last place, with 7.73 Mbps.
Any business with an international scope needs to be aware of this. They need to be aware that a website laden with image files may perform well in Singapore and South Korea but could be almost inaccessible in many key emerging markets across the world. Image optimisation is crucial to expanding a website’s reach on a global level.
User devices are becoming increasingly diverse
Internet-enabled technology has developed rapidly in recent years, providing us with a wide range of different devices from which to access the internet. In 2020, 60% of survey respondents in the UK described their smartphone as their main device for internet access, followed by laptops (16%), tablet devices (12%), desktop PCs (8%), and television sets (1%).

While these figures put smartphones far ahead of the pack, it’s worth noting that users now access the internet with multiple devices, often at the same time. This is why images need to be optimised, offering a seamless experience and consistent levels of performance across all devices.
The environment
The internet uses a lot of energy, so is a contributor to global warming. Images take up server space and increase bandwidth when they’re downloaded . According to 2021 figures from HTTP Archive, images make up 46% of a page’s overall weight on average. They’re energy-hungry compared to text and code.
Even if you’re using green hosting, cutting-down on file size can help reduce your website’s energy payload, so is always worth doing. As we’ll see later, you can do this without compromising on image quality.
Search engines favour efficient, agile pages
This factor is effectively a combination of all of the above. Search engines such as Google are using increasingly sophisticated algorithms to assign rankings to websites. These algorithms are increasingly weighted towards high-performance pages.
- Google’s Mobile-first indexing means that websites need to be optimised for mobile devices, not just for laptop or desktop browsing
- User experience and engagement factors appear to influence Google’s algorithms. If users aren’t engaging with your website – for example, due to a poor page loading time – this may be reflected in your page’s SEO performance.
- If you’re providing products or services to a specific geographical location, and your website cannot be effectively displayed in that region due to loading times, this could have a negative impact. If you’ve optimised your search terms for the Irish market, for example, and your page performs poorly in Ireland, your keyword research and SEO initiatives will be wasted.
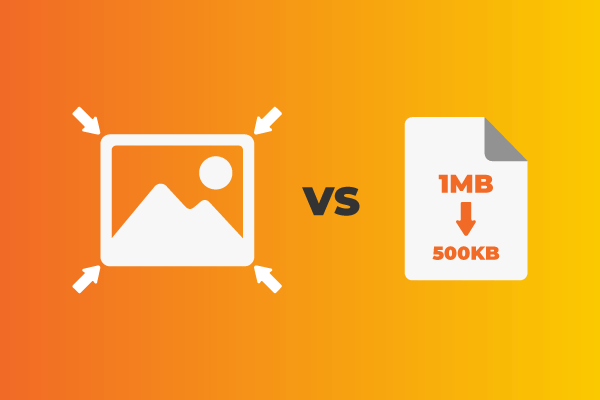
Image optimisation for the web: file size and image size
Image optimisation for websites offers two approaches. You can reduce the actual image size itself: the number of pixels displayed in the image on your site. Or you can reduce the size of the image file that is hosted on your server.
Both approaches achieve the same ends: the image size is reduced and the page can be loaded more quickly. But the two methods are not interchangeable.
Reducing the image size
Reducing the actual image size means that the image will appear in smaller dimensions to your user. Rather than hosting a large 3000 pixels by 1500 pixels banner image, for example, the image may be restricted to a much smaller 1000 pixels by 500 pixels.
If people are using a small screen they won’t notice the difference. There are plenty of free tools you can use to resize your image online, ready for deployment on your website.
You can stretch the image back to its original dimensions, but the quality will be significantly reduced, harming the user experience. Remember that you still need to be achieving a high-quality visual presentation for your website and users may head elsewhere if you don’t.
Reducing the file size
Reducing the file size effectively means compressing the image file to make it more suitable for the web. With this strategy, you’re targeting ‘lossless image compression’. That is, reducing the size of the image without losing any of its quality. This isn’t possible if you simply reduce the resolution of the image in pixels.
Image files typically include more data than just the image itself. For instance, JPEG and PNG files may include metadata or other pieces of information that need to be read before the image can be loaded in the browser. So, to compress a PNG or a JPEG image, you may simply need to remove or minify this extra data.
But this is only scratching the surface of image compression and file resizing. There are other opportunities to reduce file size and achieve a web page performs well without losing that all-important image quality.
Understanding image file size optimisation
So far, we’ve looked at two very basic techniques for image optimisation: reducing the image resolution itself and the preferable option of reducing file size. But we’ve only touched on this second technique very briefly.
In fact, reducing the file size is a diverse topic, with a number of different considerations. Here are a few things you need to be aware of as you target optimised images ready for publication:
Compression rate
It’s important to remember that compressing a file doesn’t necessarily mean that you’ll be able to keep the necessary picture quality. You’ll need to be aware of the compression rate. This refers to how much the image file is being compressed by.
For example, if you have a very large image JPEG file – around 2.0MB, perhaps – you’ll need to compress this significantly. This would make up over 100% of your total ideal page file weight and could be more than 200% in some cases. The best total image size for a web page is between 1MB and 2MB, so the smaller you can make your image files, the better.
If you choose a low rate of compression, you may be left with a file of around 500kb, which still may be too big. A high compression rate could leave with a file of around 60kb. While the file will contain some additional data, once this data is removed, any further compression is applied to the image itself, so we can expect this image to be low quality.
Instead, a medium rate of compression – ending-up with a JPEG file of around 150kb – is likely to be the happy medium.
Lossy vs. lossless
This idea of extracting unnecessary data from the image file brings us to lossy vs. lossless compression. Once the unnecessary extra data is removed, any further size reduction may target the data of the image itself, resulting in lossy compression.

Put simply, lossless compression only removes additional data: the data that’s not needed to display the image. Lossy compression goes further than this and removes data used to display the image on the page.
As you’d expect, lossless compression results in image quality that’s consistent with the original, while lossy compression reduces it. Although even with lossy compression, you may have to have expert eyes or a very big screen to see the difference.
In most cases, lossless compression can be reversed, while lossy compression can’t be.
Transform coding
Effective file size reduction relies upon first identifying opportunities for optimisation. For example, which parts of the file can be reformatted or removed to achieve a more streamlined, lightweight file?
Of course, the image metadata can be removed, but image optimisation may need to go much further than this. With transform coding, the code of the image itself is altered to achieve a smaller file.

This is classed as lossy compression, because some of the image’s quality and integrity are lost. But this may not be perceptible to the human eye. More technical image compression apps and tools will use transform coding on an automated basis. This puts highly technical capabilities into the hands of those who do not have a background in coding and file modification.
Chroma subsampling
No, it’s not the latest dubstep technique.
Chroma subsampling is another highly technical form of image optimisation that’s based upon the colour distinguishing capabilities of the human eye.

Basically, the human eye is far more sensitive to the luminance of an image than the specifics of the image’s colours. Luminance refers to the black and white content of the image, so we can think of luminance – or luma – as the brightness of the image, while chroma is the image’s colour makeup.
When chroma subsampling is used, some of the data relating to the image’s colour – or chroma – is removed and discarded, while the brightness – or luma – remains largely unchanged. This results in colour differences between the original and the optimised image, but these colour changes are difficult for the human eye to register during normal viewing. The file size is reduced without any perceptible change in quality.
Huffman coding
Huffman coding uses an algorithm to perform lossless image file size reduction and optimisation.
This technique is based upon the frequency of different characters within the image code. More frequent characters are denoted with short, simple pieces of code to reduce the complexity of the file, while less frequently occurring characters are denoted with more complex codes.

Once Huffman image compression has been applied, the file’s code makeup will be streamlined, removing any excess file size caused by inefficient code. With this method, there is no reduction of image quality, as file data is reformatted rather than being removed outright.
File types for image optimisation
We’ve discussed some of the more technical aspects of image compression, but it is possible to achieve more a streamlined image simply by changing the file type: converting the image file from one format into another.
How do you choose a file type when optimising your images? It depends on the type of image you want to optimise and how you want to use this image. Before we get into the different file types available to you, we should first look at raster and vector image files.
Raster images
Raster image files store and display images as a bitmap, or a grid of tiny pixels that create a complete image when viewed as a whole.

There are no defined lines within a raster image, other than the minute lines that form the boundary of each pixel. Instead, variations in pixel colour create the impression of shading, or moving from one colour to another. When viewed close up – for example, with a zoom that can pick up variations not perceptible to the human eye – these pixel gradations will be visible, like above.
The raster image will be displayed in a particular resolution, usually known as dots per inch or dpi. If the dpi level is very high, there are more pixels per inch, and the image is more precise. The image file will also be larger. If the dpi level is relatively low, there will be fewer dots within each inch of the display, and the image quality will be reduced.
Despite what screen manufacturers want you to think, the human eye can’t differentiate between different dpi rates beyond a certain level. So reducing the dpi can achieve lossy compression without any perceptible difference in image quality.
Photographs and scanned drawings or other artworks are best suited to a raster file format. Highly detailed graphic images may also be suitable. It’s possible to convert raster images to vectors if required.
Vector images
Vector images are not based on bitmaps but instead make use of mathematical formulae. These formulae represent shapes and forms with clearly defined lines, such as polygons or defined curves. Colour values are represented uniformly, with none of the variation and gradation between pixels found in raster images.
This makes vector files ideal for very specific image types, for example, graphs and charts, simple line images or icons. The clear line definition also makes them great for logos, banners, and fonts.
Meanwhile, the simpler construction of the image makes it possible to scale up or scale down the image with no variation in quality, as there are no pixel blocks to be distorted or magnified: it’s just maths!

As a result, vector image files may be unsuitable for photographs or highly detailed artworks, as they can’t display the appropriate detail or gradation.
Raster Image File Types
PNG
Portable Network Graphic (PNG) files are among the most popular image file formats, with 79% of websites using them. These image files are high quality – but tend to be large as a result.
It was designed to facilitate lossless image compression and conversion, although lossy conversion is also possible. Due to the relative file size, PNG files may only be suitable for displaying simpler images. They’re preferred over JPG for icons, and can have transparent backgrounds.
APNG
Animated PNG files can be used to display short animations using several PNG frames, similar to the more commonly seen GIF file.
JPEG
JPEGs are another commonly encountered image file format and they’re used on 73% of sites. These files are generally smaller than their PNG equivalent.
They’re better suited for displaying rich images with lots of colour. JPEG files can be used for lossy as well as lossless optimisation, and users can manually adjust the level of quality to achieve the best results.
JPG
References to JPEG and JPG file formats are often used interchangeably – for good reason. The two formats are almost identical, and both store and represent images in exactly the same way.
The only difference is the file extension: early Windows operating systems imposed a limit of three letters on file extensions! So JPG was used until OS updates made JPEG extensions possible. The Joint Photographic Experts Group, who developed the JPEG file, used this opportunity to more accurately represent their name in the file extension.
JPEG 2000
JPEG 2000 is an updated version of JPEG, designed to smooth out some of the errors that can occur when using the older file format. For example, it’s more resistant to bit errors that can cause inaccuracies within the raster image.
Compression can also be more flexible and reliable, as both lossless and lossy compression is achieved within a single architecture, and both aspects can be deployed within a single image file. On the downside, JPEG 2000 is not yet universally supported by browsers and isn’t compatible with the original JPEG image compression algorithm.
JPEG XR
Sounding like the souped-up model of a car, JPEG XR is the “extended range” version of a JPEG image file. It’s designed to provide higher quality compression capabilities on high-definition images.
It keeps much of the original image quality without relying on a large file size. Like the standard JPEG, JPEG XR supports both lossy and lossless conversion.
JPEG XL
JPEG XL uses a coding system that’s designed for responsive image display: essential in today’s diverse browsing device landscape.
The XL file is compatible with the original JPEG coding system, and JPEG files can be compressed into JPEG XL files to reduce the overall file size. This format is intended to provide a high-quality image display for professional-level photographs without placing unnecessary weight on the server.
GIF
GIF files are simpler than PNGs and JPEG/JPGs and use only 256 colours to represent the image. This makes GIFs good for animated images, but less so for more complex static images. They only support lossless conversion.
HEIC
These are the raw files you’ll get if you use a recent iPhone or iPad. HEIC files tend to be smaller than more traditional raster files such as JPEG/JPGs.
They support a 16-bit colour scheme to the JPEG’s 8-bit. HEIC is the file extension, while the file format is known as HEIF (High Efficiency Image File Format).

WebP
WebP provides a slim image file format but may not be supported by all browsers – although most have adopted them now.
It’s designed to support lean and streamlined web pages. Image files can be converted into WebP on a lossless or lossy basis to achieve smaller files that retain precision and accuracy. The conversion uses predictive coding, reading the values of specific pixel blocks and then predicting the values of adjacent blocks. This results in changes to the image that are imperceptible to the human eye.
Lossless WebP images are around 26% smaller than standard PNGs, and between 25% and 34% smaller than JPEG files at the equivalent SSIM – or structural similarity – index. Lossy compression can also be implemented, resulting in even smaller images while keeping much of the original image’s quality.
PSB
PSB stands for Photoshop Big, and is a file format used by the popular image modification software platform.
BMP
Good old-fashioned BMP files are standard bitmap files. In the early days of the internet, BMP was the primary file format for displaying raster images.
They were the kind of pictures you saw loading line-by-line, if you’re old enough to remember those fun days! Today, PNG and JPEG files are more common.
Vector image file types

SVG
Scalable Vector Graphics files are compatible with the SVGMinify tool discussed below and are among the most commonly deployed vector files, being used on 35% of sites.
The example vector we use above is an SVG. The compressed version of the SVG file is an SVGZ file.

VSTM
The Visio Macro-Enabled Drawing Template is a common file type produced using the Visio drawing application.
AI
AI stands for Adobe Illustrator. Adobe’s products are very popular among publishers seeking to create professional-quality graphics, and so AI files are common vector file types.
XAR
Xara Xtreme Drawing files are vector files produced using Xara Xtreme, an image manipulation tool.

CDR
Nope, not somewhere you store ripped MP3s, CDR files are vector files produced using CorelDRAW.
Image conversion and optimisation tools
There are lots of different free and paid tools that can be used to achieve effective conversion. Some are built into popular software platforms – such as content management systems (CMSs) or imaging software – while others are standalone applications.
There are also web apps that can achieve conversion and optimisation within a browser.
Image optimisation online
Web-based applications that open in a browser window are often a popular choice. This is because they offer high levels of convenience and an intuitive user interface. There’s no need to download the app.
But this does have its drawbacks. It means that the app isn’t added to the business’s web development and content management toolkit. Instead, it exists solely in the browser and if the developer decides to terminate support for the app, the solution will no longer be available.
Also, the compression results achieved by in-browser applications may be limited.
Even so, there are loads of good web-based options out there, and it’s certainly worth taking the time to research them to find one that matches your requirements.
TinyPNG
TinyPNG is a user-friendly web-based image optimisation tool. Users can drag and drop images from their device storage, compressing up to 20 images at any one time.
Each file is limited to 5MB each, which does provide quite a lot of scope. However, users have no control over the compression rate applied to the image. TinyPNG is also available as a Photoshop or WordPress image compression plugin, with free functionality.

Optimizilla
Optimizilla works in a similar way to TinyPNG and can handle up to 20 raster images – specifically PNG or JPEG files – at the same time.
It provides additional control and flexibility. Users can apply different settings to their images, altering the compression rate to achieve the ideal level of quality. Plus it has a cute dragon as its logo – what’s not to like?
Compressor
Compressor offers broader capability than the first two tools and is capable of handling images of up to 10MB. This should provide ample scope in almost all use cases, as 10MB is a significant size for an image file.
Compressor is also able to handle more file formats than a solution like Optimizilla, covering both raster and vector image files. JPEG, PNG, GIF, SVG, and WebP files are all compatible.
Compressnow
Compressnow accepts up to 10 images at any one time, allowing for bulk uploads and compression tasks. These images can be quickly and easily uploaded to the web app from your device.
You can adjust the compression rate of the image by increments, although there is not much room for variation beyond 20%, 50%, and 100% compression.

SVGminify
SVGminify is designed specifically to reduce the size of SVG images – which are usually small to start-with! It offer a simple interface for file upload and management.
As a specialised solution, it is perhaps not so suited to general applications as other entries on this list, but it does provide effective compression for SVG image files.

Squoosh
Squoosh is a popular free image optimiser and a relatively-new kid on the block. It was developed by Google, which makes it an attractive candidate for anyone seeking to achieve an SEO boost through page and image optimisation.
It doesn’t support bulk uploads, which can make large-scale image optimisation tasks lengthy and laborious. However, it does offer conversion to WebP, something that the others don’t offer.
Standalone image optimisation apps
Standalone optimisation tools and apps are those you download to your device. They tend to be more capable compared to web apps. You can exert more control over compression rates and other optimisation parameters. Plus there’s more scope for remote usage and building the app into digital toolkits.
These standalone apps are less likely to be free tools and may require a subscription fee before all of their features are unlocked.
PNGGauntlet
PNGGauntlet is an effective tool for shrinking the size of PNG raster files. However, its specialisation means that you might need to deploy other solutions to achieve reliable compression of other image file types.
PNGGauntlet is actually an overarching structure that brings together the capabilities of a number of other optimisation solutions. Namely: PNGOUT, OptiPNG, and DeflOpt.
ImageOptim
ImageOptim is another solution that’s restricted to compressing PNG files. You can reduce the original file size by between 60% and 90% on a lossless basis.
It’s an effective option for those working with this kind of file. The developers provide ImageOptim free of charge, allowing users to bypass the terms and conditions of the Apple Store by downloading directly to their Mac device. The solution is also available on other devices and operating systems, including Windows and Linux.
Optimising within imaging software
It’s not always the best idea to use lots of different standalone apps and software within your digital toolkit. It can become messy and confusing, particularly if there’s no direct integration between different pieces of kit.
If you’re using imaging software, it makes sense to integrate image compression and optimisation capabilities. Plugins and addons for popular image software suites make this possible and can make for more straightforward experience. Using Photoshop to optimise images for the web is far more streamlined than using Photoshop alongside another application.
But this may mean sacrificing capability for convenience.
Some optimisation solutions that are integrated within imaging software or applications may not be able to achieve the compression rates you need and may leave you with images that are still too large. So you’ll still need to be aware of how many images they are uploading to a page. It can be easy to go over the ideal 1MB to 2MB guideline when you’re relying on imaging software plugins.
Optimising within CMS
Another option for streamlining your digital toolkit without compromising on compression rates or image quality is to find plugins and addons that integrate with your content management system (CMS).

There are many CMSs out there, each one used by businesses to maintain and manage their websites, and WordPress is one of the most popular. Here’s some popular WordPress plugins for optimising images:
Optimising in bulk
Many of the tools discussed above could be referred to as ‘bulk’ image optimisers. The definition of a bulk optimiser is a tool that supports the optimisation of multiple images at the same time, generally in batches of ten or greater.
However, in this section, I’ll be looking at image tools that can do more than this. They’re the tools that can handle bulk compression on an automatic or programmatic basis. They greatly increase the efficiency of the whole process and can save you hassle and time.
Bulk image resizers
Before we get into the more technical aspects, let’s first examine bulk image resizers. These image resizers work in largely the same way as the tools we have already looked at above. That is, images are selected from the device, and the resizing and optimisation parameters are applied to all selected files.
The difference largely relates to the scale of the operation. For example, a tool like Bulk Resize Photos can handle up to 150 images at any one time and is designed to provide rapid compression. It’s capable of providing batch resizing in only 60 seconds. This macro-level conversion helps you to compress images at scale, handling major optimisation tasks quickly and easily.
Image minification tools
With image minification, the image remains largely unchanged. Instead, the unnecessary additional code in the image file is removed to leave a streamlined file, helping page performance and loading speed. In this sense, minification is a lossless form of compression, although one that may not be suitable for very large images.
Examining, processing, and compressing images manually can be a laborious task, which is why minification tools need to provide automated features that can handle all of this without human input.
CLI
CLI stands for command-line interface, and this is a universal tool that can be used to program automated actions. There are a number of different CLI tools, including those developed for Microsoft products, WordPress and Amazon’s AWS. In regard in to images, they all achieve largely the same results: image sizing and compression parameters are inputted, and changes occur automatically.
Image optimisation via the CLI has been around for a long time – ImageMagick and its ‘Convert’ tool is a good example. But for reasons mentioned above, it’s been receiving more attention lately.
Gulp
Newer environments and preprocessors like Gulp have made image conversion tools easier to install and automate as part of the deployment process.
Webpack
Webpack converts the image file’s code format into base64 strings. These strings are then inlined within the web-page code to achieve agile, fast-loading pages.
Parcel
Parcel is designed as a universal image optimisation tool, achieving code-agnostic resizing and compression for application building. This allows automated compression for images referenced from a range of different code sources, including HTML, CSS, and Javascript, among others.
20i’s Website Acceleration Suite
We developed the Website Acceleration Suite to help business owners and publishers bring their pages up to speed. This set of tools relies on automated features that work together to boost the performance of websites.

Image optimisation plays a major role in this. Image compression rates and resizing parameters can be set and then implemented automatically across multiple web pages. You can choose to have images converted to ‘next-gen image formats’ like JPEG 2000, JPEG XR, and WebP.
All the work is carried out at server level, so by the time it gets to a browser (or Google’s tests!), your website will be significantly slimmed-down. It comes with all our shared hosting packages and Managed CloudHosting.
Google’s PageSpeed Module
We’ve already touched briefly on the SEO benefits of well-optimised images and how the improved user experience that such images provide can make a big difference to the performance of the page on Google.
Google’s PageSpeed Module’s image optimisation exists within a family of modules designed to optimise web pages. The module can be implemented within CMSs such as WordPress or as a standalone addition to your site’s native code.
It works to minify code sets, including HTML, CSS, and JavaScript, and to optimise files of a range of different types. One of the key functions of Mod_pagespeed (its techie name!) is image compression, and it can also handle conversion from PNG to JPEG, as well as conversion to WebP.
How do you optimise images for the web?
As you can see, image optimisation is a massive subject: I could’ve written twice as much just about the algorithms alone, but didn’t want you to fall asleep…hopefully, if you got this far, you learned something.
There might be tools or techniques I haven’t included, so I’d be interested in how you go about making image files smaller. Let us know below!

hi this is useful and informative articles thanks !
These are useful articles you publish.
Please can you make them available as PDF downloads, so we can download and keep them for later reading, thank you.
You can export any webpage as PDF.
Safari > File > Export as PDF
Similar process for other browsers too.